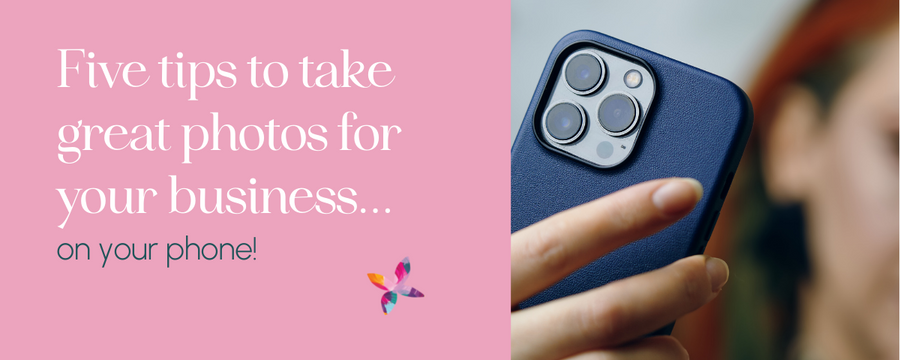
The images you share of your business and products and even of yourself can have a huge impact. I’ve been a photographer now for almost a decade and I believe passionately in the value that professional brand photographs can add to your offering.
But you can’t have a professional photographer with you all the time so today, I’d love to teach you a few little tips and tricks that will help you take beautiful photographs with the best camera there is… the one you carry with you all the time, your phone!
I’ve spent a lot of time using big, expensive cameras (and I don’t mind saying, I’m pretty good at it!!). But a thousands-of-dollars camera and lens combo isn’t always practical or convenient… and nor is the years of training to learn how to use it properly!
So I’ve also dedicated time to understanding that super-convenient device, the phone camera. I started to see it as a challenge to try and get a great shot every time I got my phone out and I began to realise that actually, the camera in your phone is a pretty powerful machine… you just need to know how to drive it!
Here’s my top five tips (plus a bonus flat-lay how-to) for taking great pics on your phone.
Tip 1: The need for speed
Sometimes you need to be quick… to catch the beautiful light or snap a great smile on your colleague’s face! The fastest way to access your iPhone camera is to wake your phone up without unlocking it, then swipe left… your Camera App will open straight away.
Also, both iPhone and Android users can open their Camera App by holding and swiping the little camera icon at the bottom right of their home screen.
Tip 2: Lights out
Please turn off all the lights… natural light is always best; utilise it as much as possible.
Artificial light can cause unwanted shadows as it creates two (or more) light sources – the natural light coming in from outside, plus the light you have turned on at the switch. It can also add a blue or orange tinge to your photos that is not appealing.
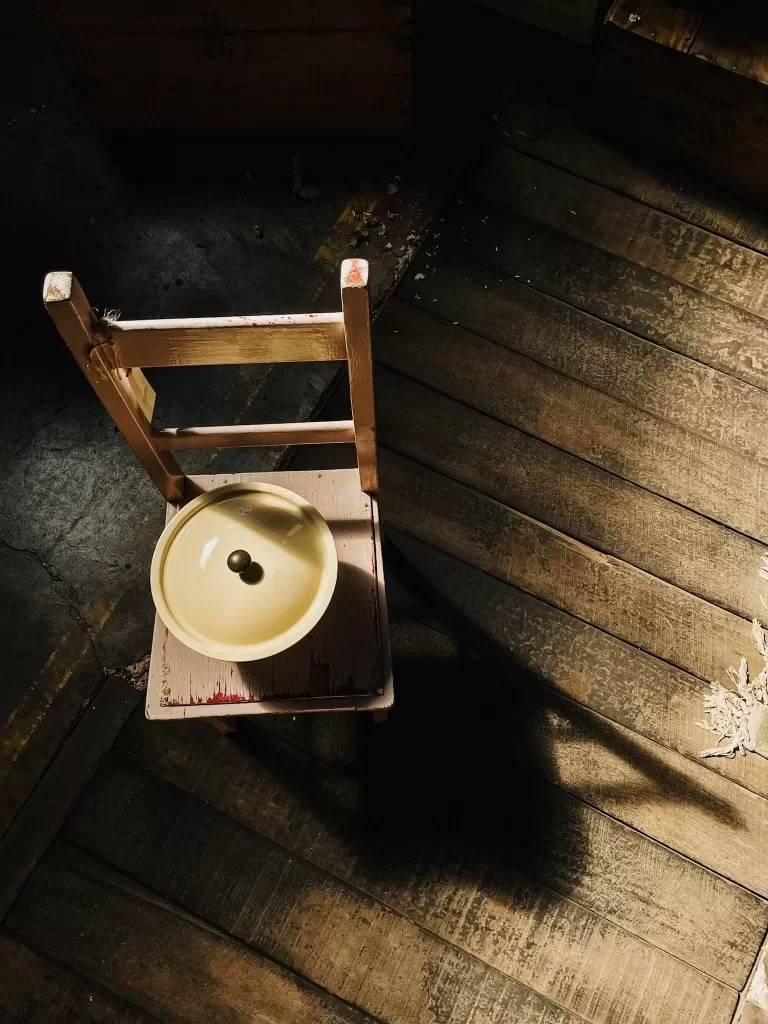
Consider the best time of day to photograph. Wherever it is that you work – in an office, paddock, studio, or even your kitchen table – its’ likely that the light at different times will suit different spaces. For example, if the morning sun comes streaming through your office window but by the late afternoon it is quite dark, then morning is the best time to snap. For the image to the left, I was inside the incredible space at @workshop26 with beautiful natural light coming in from high on the left-hand side.
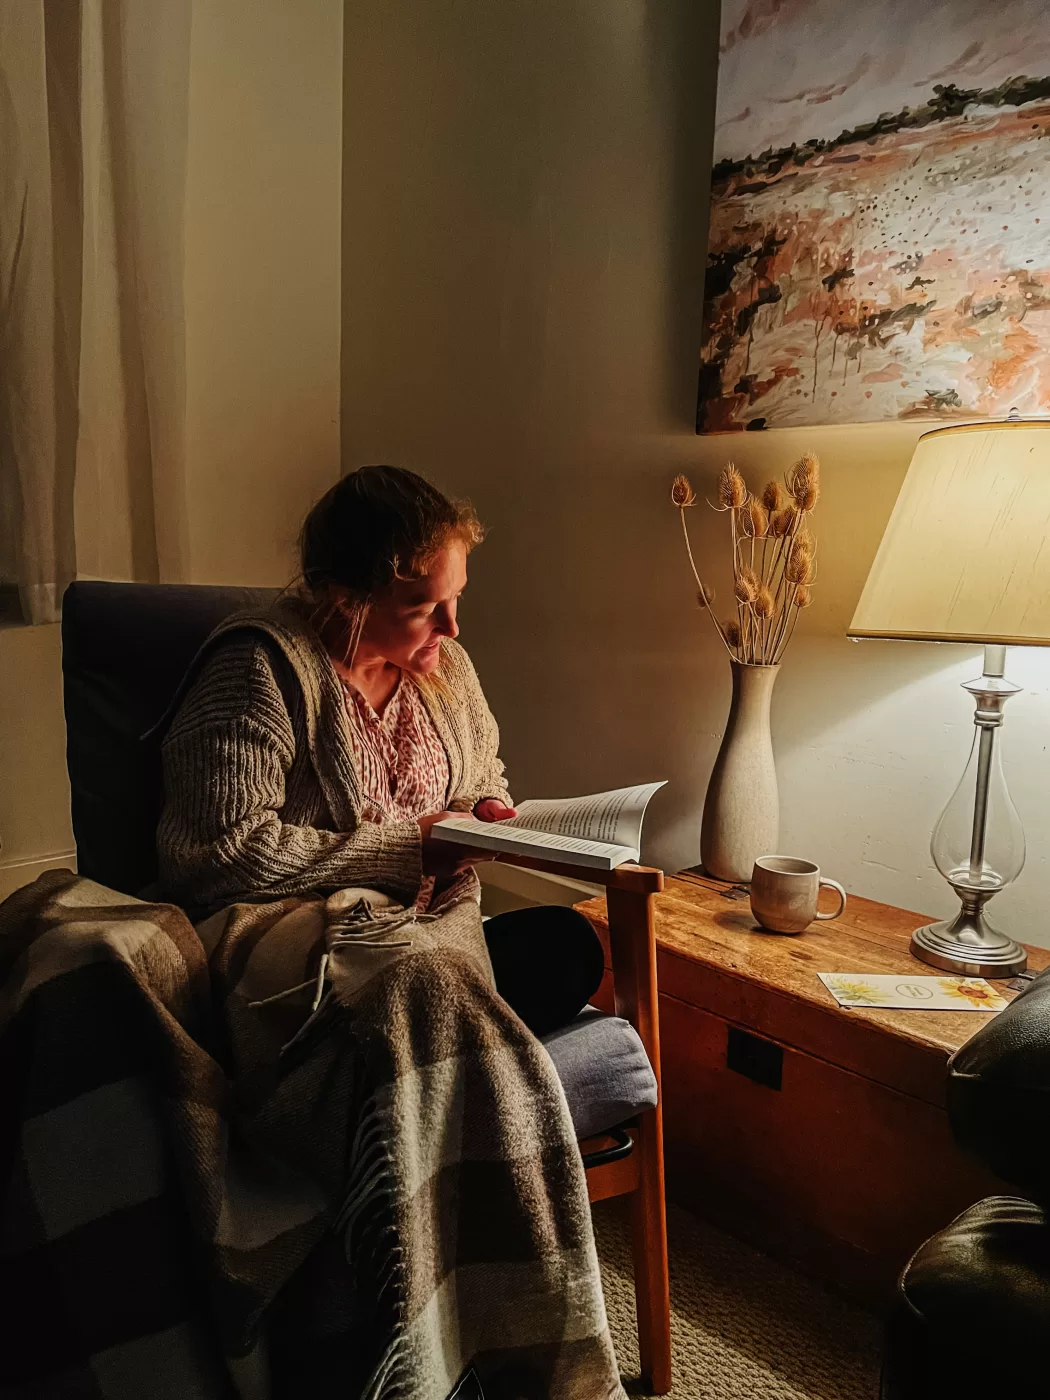
The only time to break this rule is if you’re creating the mood for a night-time scene – like this photo to the left, where I’ve deliberately used lamplight to show a cosy evening (do you like my nanna rug?!).
Tip 3: It’s all about exposure
Exposure is the amount of light you let into your lens. Adjusting the exposure before you take a photograph (rather than trying to edit it or add a filter or preset later) will help you take better shots… if you don’t, your camera will take its best guess at how much light you’d like and it often gets it wrong!
I almost always reduce the exposure a little, which creates a slightly darker image with more detail.
How? Look through the screen at your subject and tap the part of the image you want to focus on. A symbol of a sun will appear – tap and hold the sun and drag it to increase the exposure (make it brighter) or decrease the exposure (make it darker). For iPhone users you’ll drag it up or down, for Android users, left to right.
Have a play around and see what a difference it can make.
Tip 4: Lock it in
Typically, each time something or someone moves within the frame of the shot you’re lining up, any adjustments you’ve made – like setting the exposure or focus – will reset and you’ll have to start again.
To lock your exposure and focus into place, tap and hold on the screen until the AE/AF LOCK symbol appears at the top (for iPhone) or the padlock symbol closes (for Android). You can then adjust your exposure and focus as desired, and those settings will lock into place – which means that even if something (or someone!) moves while you’re taking the shot, the exposure and focus will stay the same. Perfect for capturing a moving subject!
Tip 5: Don’t go off grid
No really! Improve your iPhone pics by turning on your grid. This will enable you to see gridlines when taking a photo which helps you get the horizon line and other key lines straight before you snap. The result is a much more appealing image with straight lines.
Don’t believe me? Take a look at the image below. Taken without the benefit of gridlines, I was standing and my phone was on an angle, tilted slightly towards the subject.
In the next image, I moved back a little and knelt down and used the gridlines to make sure my phone was straight up and down and the lines in the image were straight. I think it’s a much better photograph!
Using gridlines will also help improve your composition – the arrangement of what’s in the photo to guide your viewer’s eye to the most important part. You can use gridlines to centre your subject or to apply the rule of thirds, which is an important element of great composition.
For iPhone go to Settings > Camera > Composition and set Grid to ON.
For Android go to Settings > Apps > Camera > Camera settings and set Grid lines to ON.
Practice these tips and you’ll be taking the first steps towards taking better photographs for your business; photographs that help make you stand out!
If you’d like to learn so much more, please head to my website and check out my guide The Memory Gift; it is jam-packed with tips and tricks about light, focus, exposure, composition and the all-important editing to create extra wow factor for your images – all using your phone!
Bonus Tip! How to create the perfect flat-lay
You’ve read the tips above so you already know you need to leave the lights off!
Once you’ve found the best natural light, start putting together your flat-lay by placing objects one at a time then looking at the scene through your phone’s camera. See where shadows and light fall on your subjects – the places where the light hits are the places that will POP in your photograph.
Take a shot and see what’s missing, what doesn’t feel right. Do you need to add something to a corner to complete the composition? Or do you need to take something away? Can you change the angle of an object so that the symmetry of your image feels better. Keep photographing and rearranging until it feels just right.
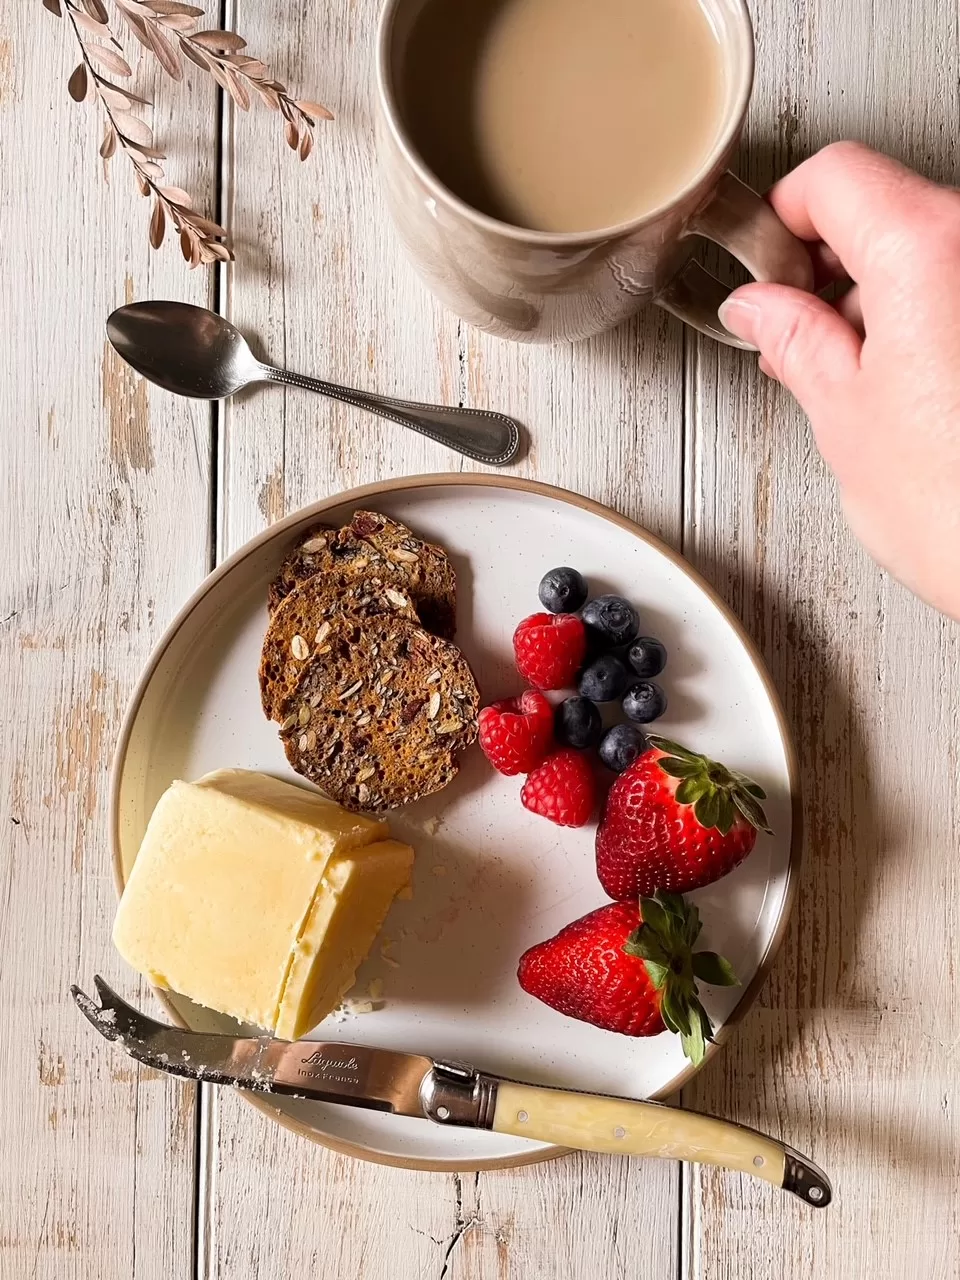
To take the image below on the left, I moved the spoon several times to find the right spot. It needed something to balance it out so I added the leaves at the top, and I spent time arranging the fruit so that light was falling on all the pieces.
A minimalist flat-lay can be really effective; the image on the right below is quite simple with plenty of white space, but still so interesting to look at.
A flat-lay is best if the photograph is taken from directly above – you might like to stand on a stool, or arrange your flat-lay on a board on the floor so you can get the best bird’s eye view!

Connect with Nadinne
Facebook: Nadinne Grace Photography
Instagram: @ngpbusinessandbrand | @nadinnegracephotography
Website: www.nadinnegracephotography.com
ARTICLE BY
Nadinne Wilkinson, Founder of Nadinne Grace Photography
Nadinne is a professional brand and content photographer, based in the beautiful Clare Valley. She is the author of ‘The Memory Gift’, a guide jam-packed with tips and tricks for taking beautiful photographs on your phone, available at www.nadinnegracephotography.com